It is a boring title because I spent ages last week trying to find the instructions for this on the Net and failed completely in all my googling.So I'm posting MY TUTORIAL for the benefit of anyone else out there making play costumes! Actually mine are Train Driver's Caps, but they are the same thing. Boring geeky m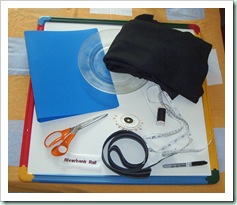 aths bit - such a cap requires a disc [the top], a frustum [the sloping bit], an open cylinder [the hat band], and a shape made from 2 intersecting arcs [the peak].
My cap is to fit a 10 year old whose head circumference is 22". You may need to adjust dimensions to fit a larger head. You will need the following
- fabric [I used a stretchy black jersey] and thread
- scissors, pins, needle, sewing machine
- a fairly stiff plastic folder - for A4 paper, but measuring 9" across.
- some stiff buckram ribbon, 1" wide, to stiffen the hatband.
- a baseball cap - to use peak as template
- a Sharpie Pen
- sheet of newspaper
- compasses - or two large discs to draw round - I used a 13" tray and a 9" pyrex plate.
- draw round the plate on the file with the sharpie. Cut out.
- draw round the peak of your baseball cap on the file. Cut out.
- put your plastic circle on the fabric, draw round. Cut out, leaving ½" seam allowance. Draw round again, to get two pieces slightly larger than semi circles,which will overlap to make a circle to line top of cap.
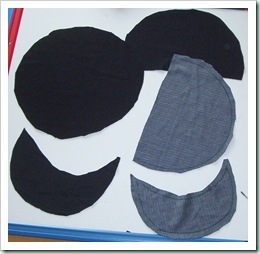
- Also draw round plastic peak twice, again allowing ½" seam allowance. [My fabric is helpfully grey on the back so you can just see the pen lines.
- Sandwich the round plastic disc between the circle and semi-circles RIGHT SIDE OF FABRIC OUT. Pin all round the edge and then seam as close as possible to the plastic.
- Place the two peak pieces together, RIGHT SIDES TOGETHER, and seam round the long curved edge. Clip curves and turn out. Slip the plastic peak inside. Pin along the top edge, and zigzag this edge closed.
- DIFFICULT BIT. To make the sloping piece, draw round your big tray, then put the plate in the exact centre of that circle and draw round. Cut out - leaving ½"
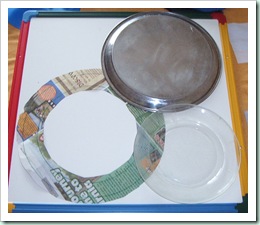 seam allowance again.
 - Now through the ring, and curve it round to fit over the plate.Pin and mark where the overlap comes, and cut it. It should be slightly less than ¼ of the shape gone.
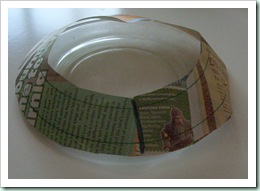 That is very hard to explain, but if you try it out, you will see what you need to do!
- Cut out one curved piece, and two strips for the band, each measuring 23" x 2".
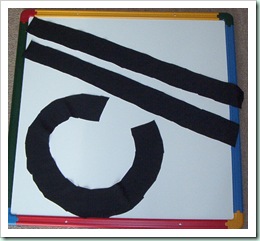 Hem one of the short straight edges of the curved bit.
 - TAKE THE PLASTIC DISC OUT OF THE CAP TOP. Now pin the LONG edge of this piece round the outer edge of your flat disc. Match the RIGHT side of the piece to the top of the hat [NOT the side with the slit across the middle.] Turn the c
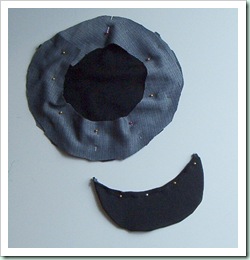 ircle over, and sew round in a circle ON TOP OF the circle you stitched before. Turn the hat to the right side. It should look a bit like a beret. I have photographed this stage with the blue disc tucked in temporarily to show what I mean. Here's a pic of the brim too.
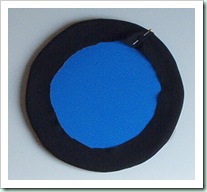
- Now it gets even more complicated. Take out the disc, and turn the cap INSIDE OUTagain.
- Carefully pin the hatband round the inner edge. Put the two rectangular strips WRONG SIDES TOGETHER and pin them in place, matching the end of the strip with the gap where the hemmed overlap is [you can just see the pin marking it in the picture] Pin the hatband RIGHT SIDES together with curved strip.
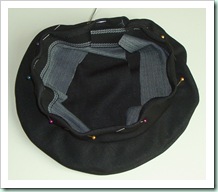 Sew all the way round.
- Now turn the hat right way out, tuck the buckram in between the two layers of hatband. Fold over the OUTER edge and machine down, close to the edge.
- Pin the peak to the OUTSIDE of the hatband, opposite the
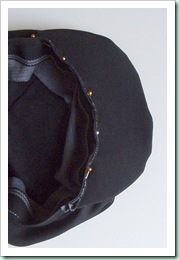 overlap [which is centre back] and machine down close to the edge. Now carefully fold the inner hatband up to enclose the buckram and hand stitch it in place all round the edge on the INSIDE of the cap EXCEPT when you get to the brim - you will need to fold it out and over the OUTSIDE , to cover the raw zigzagged edge of the brim.
 - Almost done now! Put the plastic disc inside to stiffen the top.
- If you have any sort of name or cap badge sew that on.
- Tidy up the overlap at the back, sewing together and adjusting to fit

It took me 2½ hours to make the 2 caps. I am ridiculously pleased with the results. Next time I think I might make the band a little deeper [especially if it was a cap for an adult] I think an adult might require a slightly larger disc for the top piece [in which case an A4 folder might not be quite big enough to supply the plastic]
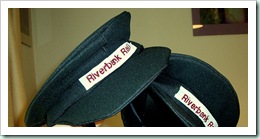 NOTE - THE SLIT IN THE TOP LINING IS IMPORTANT! You need to be able to get the disc in and out whilst you are sewing, as you cannot easily turn the cap inside out/back again with the plastic in place. When you are happy with the finished cap, manipulate the seam allowance to the underside of the disc, to leave the top as smooth as possible.
This was hard work - not sure there will be a "next time"! I am going to have tea and go to HouseGroup.


Thanks for doing this!
ReplyDeleteFantastic tutorial. Thanks to you it was there at the top of the Google search. My version is for 5 yr olds dressing up as a Park keeper (from the books) for a corner in a classroom. Couldn't have found better instructions thanks.
ReplyDeleteGreat tutorial, thanks for putting it on the net
ReplyDeleteGreat tutorial, thanks for putting it on the net. Made two naval officers peaked caps and very happy with the result.
ReplyDeleteSo pleased this has been useful for you!
DeleteI am going to make an army officer's cap
Deletethanks so much for this tutorial :) helped me a lot when making my dolls officers hat. I shared a link to this page on my blog hope that's ok :)
ReplyDeleteI had to make a military peaked cap for 10 foot tall parade character and this worked a treat! Just had to upscale all the sizings but the technique is still the same! Many thanks.
ReplyDeleteHello, M' Lady Angela. Thank You for You tutorial. I have been wanting to make a copy of the peaked officers' cap from the movie "Forbidden Planet" and a friend told me about Your tutorial. It is PERFECT. Thank You VERY much for it. After 40 years, I can actually make the cap!!! Thank You and may God Bless You and Yours, M' Lady....Yours in His Service, Larry
ReplyDeleteHello,
ReplyDeleteI had some problems and would ask if you would consider doing an step for step tutorial for this with pictures
this is so useful!!
ReplyDeleteThank you so much for the detailed instructions. We found it quite complicated but kept reading and thinking and now have a magnificent post office cap, all ready already the local panto!
ReplyDeleteMerry Christmas and many thanks, it was a lot of fun AND it looks good!
Patrick and Cath in Bristol
I'm going to make it, thanksthanks!
ReplyDeleteThank you so much for this. Have been searching the Internet and had found nothing, then came across your tutorial.
ReplyDeleteGlad to be of help Cindy
Delete